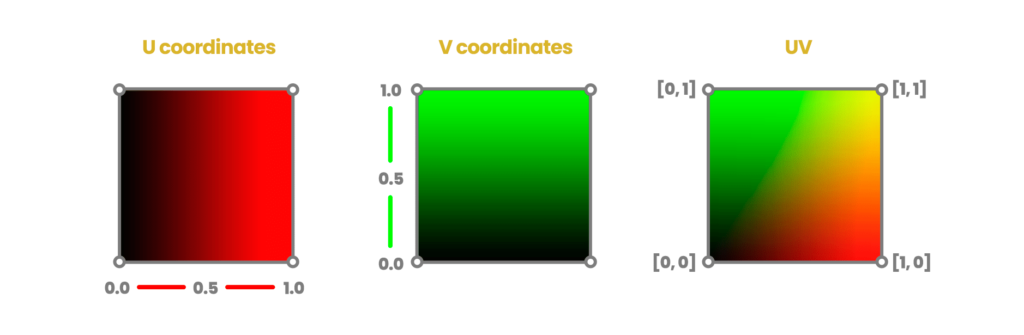
Everyone has changed the skin of their favorite character for a better one. UV coordinates are directly related to this concept since they allow you to position a two-dimensional texture on the surface of a three-dimensional object. These coordinates act as reference points, which control the corresponding texels in the texture map to each vertex in the mesh.
The process of positioning vertices over UV coordinates is called UV mapping and is a process by which UV, that appears as a flattened, two-dimensional representation of the object’s mesh, is created, edited, and organized. You can access this property within your shader, either to position a texture on your 3D model or to save information in it.
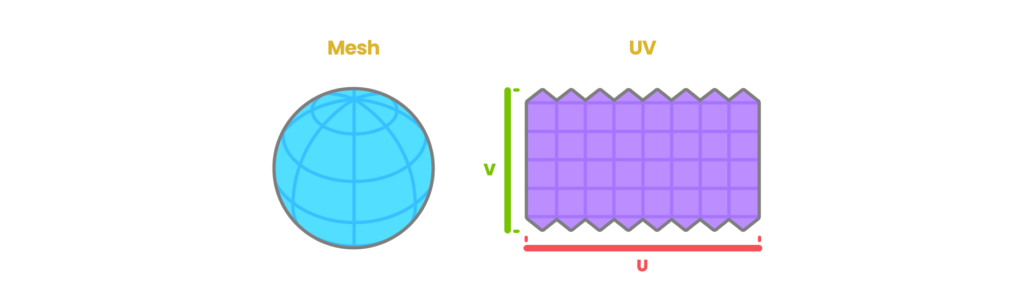
The area of the UV coordinates is equal to a range between 0.0 and 1.0, where “zero” [0.0, 0.0] means the starting point and “one” [1.0, 1.0] to the endpoint.